Tuesday, 31 May 2016

♡芒果蛋糕 Mango Cake♡

宝贝的每年生日都遇上芒果季节
加上他超爱芒果,
今年也不例外,做了个*芒果蛋糕*替他简单的庆祝~
没有漂亮的卖相,但是味道超赞!
自己一手‘煲’办,不甜不腻正合家人的口味~


材料:
(1) A蛋黄7颗
     蜀米油50克
     特幼粉80克
     芒果味优格饮料 (yogurt drink) 85克

      盐1/4茶匙
(2) A蛋白7颗
     幼糖70克(我只用60克)
     塔塔粉1/2茶匙(可以1大匙柠檬汁代替)
做法:
1.将材料 (1)用打蛋器拌匀,放一边避免吹到风。
2.把材料(2)的蛋白倒入另一个干的大盆中,用电动打蛋器打发,分次加入幼糖打发成双倍,再加入半茶匙的塔塔粉,再打至蛋白拿起来尾端弯形 ,即可。
3.将1/3打发好的蛋白加入刚才已拌好的(1)面糊,以勺子(spatula)翻折方式 (fold in)将面糊和蛋白拌匀,再将它倒入剩余的蛋白中拌均匀。
4.倒入圆模里,稍微敲一下让多余的气泡跑出来,这样烤出来的蛋糕才不会有洞洞。
5.预热烘炉,以170°C烤约35~40分钟。
**烤炉温度及时间依各自烤炉自行调整。
~~~~~~~~~~~~~~~~~~~~~~~~~~
奶油:
鲜奶油(whipping cream) 250克
糖粉 70克


装饰:
芒果1颗,取肉切薄片 (我用泰国黑金芒果,超甜的)


做法:
1.预先将铁碗存入冰箱让它冰冷
2.准备一盘冰水,再把取出来的铁碗放在冰水上。
3.将鲜奶油与糖粉倒入铁碗内,用电动打蛋器打发。
4.将蛋糕分成两半,然后把奶油涂在其中一片蛋糕的面上,铺上芒果片,再将另一片蛋糕
上。把剩余的奶油涂在蛋糕面上和蛋糕旁边。
5.将芒果排列铺上芒果片即可。存入冰箱冷藏2~3小时即可享用。


Ingredients:
(1) 7 A size egg yolks
      50g corn oil
      80g Superfine flour (sifted)
      85g Mango yogurt drink

      1/4 teaspoon salt
(2) 7A egg whites
     70g granulated sugar (I reduce to 60g)
     1/2 teaspoon tartar
Method:
1.Whisk all the ingredients (1)~ egg yolks, yogurt drinks, corn oil and salt in a large mixing bowl.Add in sifted super fine flour,mix well and set aside.
2.With another big bowl, add in ingredients (2)~ egg white and sugar (with 2~3 batches), tartar, whip it with medium speed until peaks form.
3.Add 1/3 of egg whites (step 2) to batter (step 1). Use spatula to fold in and slowly mix it well.Pour gradually the mixture into remain egg whites, repeat the step, fold in again with spatula until well mixed.

4.Pour the mixture into round shape mould, bake it under preheat oven 170 celsius for 35~40 minutes.
~~~~~~~~~~~~~~~~~~~~~~~~~~

Whipping cream
250g whipping cream
70g granulated sugar

Decoration
1 big Thai mango, removed skin, sliced
Method:
1.Whip the cream and sugar with medium speed until smooth.

2.Cut the cakes into two portion, wipe the cream on a piece of the cake. Following lay the sliced mango on the top of the cream.
3.Continue with another piece of the cake on the top. Repeat the steps by wiping the cream on the cake and the side of the cake.
4.Decorate the cake with sliced mango. Chill in the fridge for at least 2~3 hours before to serve.


Sunday, 22 May 2016

♡咸蛋虾姑肉 Salted Egg Mantis Shrimps♡

老公最爱吃虾姑肉,
难得巴刹今早有卖,
就买了包回来尝试来煮,
今晚就吃它~  *咸蛋虾姑肉*


材料:
虾姑肉 半公斤(我买的是已经去壳的虾姑)


咸蛋黄 3颗(预先蒸熟后压碎)
蒜末 2大匙
小葱头末 1大匙
小辣椒 3条,切小颗粒
咖喱叶 1小把,洗净沥干
牛油 1大匙
淡奶50克
合隆粉 半包
蛋白 1个

调味料:
盐 少许
胡椒粉 少许
糖少许

做法:
1.先将虾姑肉和少许盐巴、胡椒粉混合均匀,存入冰箱腌制半小时。
2.热油,将虾姑肉粘上蛋白再沾上合隆粉,然后炸至金黄色,捞起沥干备用。


3.热锅,下牛油,爆香蒜末、小葱头末。然后加入咖喱叶和咸蛋黄,将它炒出味。
4.加入淡奶、小辣椒和糖,待滚开后,倒入已炸好的虾姑肉,快速拌均匀即可上碟。

Ingredients:
1/2 kg mantis shrimps (without shells)
3 pieces salted egg yolk (Steamed and mashed in advance)
2 tablespoon chopped garlic
1 tablespoon chopped shallots
3 chilli padi,cut into small section
1 stalk of curry leaves,washed and drained
1 tablespoon salted butter
50g evaporated milk
1/2 packet of  Hup Loong frying powder
1 egg white

Seasoning:
pinch of salt
dash of pepper
1/4 teaspoon of sugar

Method:
1.Combined well the mantis shrimps meat with salt and pepper,chill in the fridge at least half an hour.
2.Preheat oil, dip the mantis shrimps meat with egg white, coated with Hup Loong flour. Fried it until golden brown color, drained and set aside.
3.Saute chopped garlic, chopped shallots with butter until fragrant. Add in curry leaves and salted eggs, saute until aroma.
4.Add in evaporated milk, chilli padi and sugar, quickly add in fried mantis shrimps, stir well and transfer to a plate.

Thursday, 19 May 2016

♡鲜橙牛油杯子蛋糕 Orange Butter Cupcakes♡

满屋飘香的*鲜橙牛油杯子蛋糕*
前几天教师节做了些让宝贝带去请老师品尝,
也留了几个给宝贝们。
今天他们又在吵想吃,
结果还是动手做了来满足他们,
明天的早餐就简易搞定了!~
**食谱参考与 Beehong Foo 亲的香橙小蛋糕


材料:
鸡蛋 (A蛋) 4个
牛油 250克 (我用金桶无盐牛油)
幼糖 170克 (我减至150克)
盐 1/4茶匙
鲜橙 1个,取汁 (约80克)
橙皮碎 1大匙
自发粉 250克 (过筛)
发粉 1小匙 (过筛)
青红樱桃碎 各2大匙

做法:
1.先将牛油和幼糖用电动打蛋器打发至乳白色。
2.慢慢地分四次加入鸡蛋(鸡蛋一颗一颗逐渐加入,否则打发出来的面糊会变成豆花块状)
3.加入橙汁、橙皮和盐搅拌均匀,最后分次加入过筛的自发粉和发粉,混合均匀。
4.将面糊倒入纸杯里,然后撒上少许青红色樱桃碎。
5.预热烤炉,以160度烘至蛋糕变金黄色即可,约40~45分钟。
(温度与时间视个人的烤炉自行拿捏)


Ingredients:
4 (A) size eggs
250g butter (I use golden churn unsalted butter)
170g granulated sugar(I reduce to 150g)
1/4 teaspoon salt
80g orang juice
1 tablespoon chopped orange peels
250g self raising flour (sieved)
1 teaspoon baking powder(sieved)
2 tablespoon (each) green & red chopped cherries

Method:
1.Beat the butter and granulated sugar until fluffy and light with mixer.
2.Slowy add in eggs, one by one and mixed well.
3.Add in orange juice, peels and salt, combine well. Lastly sift in 1/3 of raising flour, mixed well and continue for another 2/3 until the batter is smooth and well combined.
4.Pour in the batter into paper cups, sprinkle some green and red cherries on the top.
5.Preheat the oven, bake the cupcakes under 160 degree for about 40~45 minutes.


Tuesday, 17 May 2016

♡糖醋腐皮马友鱼 Sweet and Sour Vinegar Fish with Fu Chok♡

酸酸带点甜味的开胃晚餐 *糖醋腐皮马友鱼*
我妈妈常爱煮的一道菜~
别有一番的风味!~


材料:
马友鱼 1大片 (任何鱼肉都可以)


淡腐皮 1大片,剪成小块
文冬姜 5片,切丝
红辣椒 1条,切丝
蒜末 1大匙
青葱粒 1大匙

调味料:
甜豆瓣酱 1/2 汤匙
浙醋 2~3大匙


糖 少许
水 200毫升
薯粉 1大匙 + 1大匙水

做法:
1.预先将剪好的腐皮炸至金黄色,捞起沥干,备用。
2.然后再将马友鱼肉沾上少许薯粉,然后煎至两面金黄色,捞起备用。
3.爆香蒜末,姜丝和豆酱。
4.倒入水和调味料,加入腐皮,以中小火煮至软,约10~15 分钟,然后再加入已炸好的鱼肉片和辣椒,再焖多5分钟。
5.倒入薯粉水勾芡即可上碟。最后撒上少许青葱就大功告成。


Ingredients:
1 slice ma yao fish or any fish sliced (任何鱼肉都可以)
1 piece fu chok, cut into small pieces
5 slices ginger,shredded
1 red chilli,shredded
1 tablespoon chopped garlic
1 tablespoon chopped scallions

Seasoning:
1/2 tablespoon of Fermented bean paste
2~3 tablespoon black vinegar
pinch of sugar
200ml water
1 tablespoon tapioca starch + 1 tablespoon water

Method:
1.Fried the fu chok in advance until golden brown color, drained and set aside.
2.Coated some tapioca starch on the fish and deep fried both side until golden brown color, drained and set aside.
3.Saute chopped garlic, ginger and fermented paste until fragrant.
4.Add in water and seasoning and bring it to boil, add in fu chok, simmer for 10~15 minutes under medium low heat. Following add in fish and chili, bring it to simmer for another 5 minutes.
5.Pour in tapioca starch for thicken the gravy, off the heat, ready for transfer on the plate. Sprinkle some scallions on the top of the dish.


Saturday, 14 May 2016

♡滑蛋生面 Wat Tan Mee @ Cantonese Fried Wonton Noodles in Gravy♡

孩子考试期,忙着陪读没有时间做多工的料理。

简单煮了*滑蛋生面*,

今天午餐热腾腾搞定!~


材料:
云吞面 2团,弄散,
蒜末 1大匙
虾仁拌小饭碗
菜心 1棵,洗净切段
鸡蛋1个
鱼饼半条,切片
鱼丸 5粒,切半
高汤 4饭碗 


调味料:
蠔油1大匙 
鸡精粉半茶匙
盐适量
胡椒粉少许
薯粉2大匙+2大匙水

做法:
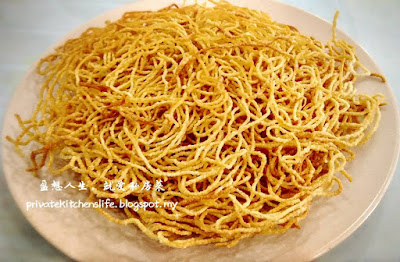
1.热油,云吞面分次炸至金黄色,捞起沥干油备用。


2.爆香蒜末,倒入高汤,待滚开后加入虾仁,鱼饼鱼丸,和菜心,滚约3分钟。
3.加入适量的盐,蠔油,胡椒粉,鸡精粉拌匀,加入薯粉水勾芡,熄火前加入蛋液快速搅拌匀,离火。
4.将已煮好的酱汁及材料淋在生面上,趁热享用。
**材料可依个人喜好自行加入如虾仁或猪肝。


Ingredients:
2 fresh wonton noodles,loosed
1 tablespoon chopped garlic
1/2 small bowls of prawns
1 stalk choy sum,washed and cut into portion
1 egg
1/2 piece fish cake, sliced
5 fish balls,cut into half
4 bowls of chicken stock

Seasoning:
1 tablespoon mushroom oyster sauce
1/2 teaspoon chicken powder
pinch of salt
dash of pepper
2 tablespoon tapioca starch + 2 tablespoon water


Method:
1.Preheat oil,loosed the wonton noodles and separate into few portion, fried the fresh wonton noodles until golden brown color, drained and set aside.
2.Saute chopped garlic, pour in chicken stock and bring it to boil. When the chicken stock is boiling add in fish cakes, fish balls, vegetables, and prawns and bring it to cook for about 3 minutes.
3.Add in all the seasoning, stir well. Pour in the tapioca starch and lastly add in the beaten egg, off the heat.
4.Pour the gravy on the fried noodles and it is best to served in while it is hot.
**Ingredients can be added according to individual's favourite 

Thursday, 12 May 2016

♡丝瓜虾仁烩鸡蛋豆腐 Braised Egg Tofu with Luffa and Prawns♡

周五快手快脚的午餐 *丝瓜虾仁烩鸡蛋豆腐*
简单又营养的午餐,宝贝们爱吃!~


材料:
丝瓜1条,去皮切片
虾仁 10只
日本豆腐 3条,每条切半
鸡蛋 2颗,打散
红萝卜 2寸,切片
蒜头 3瓣,切片
红辣椒 半条,切片(点缀)
上汤 150~200毫升

调味料:
盐 适量
鸡精粉 适量
胡椒粉 少许
绍兴酒 1大匙

做法:
1.预先将日本豆腐炸至金黄色,捞起沥干油,备用。
2.爆香蒜片,加入红萝卜翻炒一下,再加入丝瓜和虾仁和调味料快速翻炒。
3.将鸡蛋,待稍微凝固后再翻动。接着倒入上汤搅拌均匀让它滚开,再加入已炸好的豆腐再烩几分钟。
4.倒入绍兴酒拌匀就可上碟了。


Ingredients:
1 luffa, removed skin and sliced
10 pcs prawns, removed shells
3 Japanese egg tofu, cut into half
2 eggs, slightly beaten
2 inches carrot, sliced
3 cloves garlic,sliced
1/2 chilli, sliced (for decoration)
150~200ml chicken stock

Seasoning:
pinch of salt
pinch of chicken powder
dash of pepper
1 tablespoon Shao Xing wine

Method:
1.Fry the egg tofu until golden brown color in advance, drained and set aside.
2.Saute sliced garlic, add in carrots, stir fry a while. Following add in luffa, prawns and seasoning, stir fry well.
3.Pour in the beaten eggs, let it cook for few second and stir fry well. Add in chicken stock mix well and bring it to boil. Lastly add in fried tofu and braised it for few minutes.
4.Add in a tablespoon of Shao Xing wine before transfer on the plate.

Tuesday, 10 May 2016

♡香茅鸡扒 Lemon Grass Chicken Chop♡

如果您是喜欢香茅的味道,
那么您也会喜欢这道简单又容易做的*香茅鸡扒*
今晚无烟油的晚餐隆重上桌!~ 


材料:
(A)全鸡腿 4只,去骨
(B)香茅 8支,取白色部分,切碎
     小红葱 12颗,切碎
     蒜头 6瓣,切碎
     芫荽茎 2棵,切段
     姜
材料:
(A)全鸡腿 4只,去骨
(B)香茅 8支,取白色部分,切碎
     小红葱 12颗,切碎
     蒜头 6瓣,切碎
     芫荽茎 2棵,切段
     姜 5~6片,切碎

调味料:
小茴香粉 1大匙
黄姜粉 1大匙
辣椒粉 1大匙 (我没加)
糖 2大匙
Maggi Cukup Rasa  2大匙

做法:
1.将所有材料(B)放入电动搅拌机搅烂,备用。
2.将已搅烂好的材料与调味料混合均匀,然后均匀的涂在鸡腿肉两面,然后存入冰箱腌制至少两个小时以上。
3.烧热平底不粘锅,将鸡腿肉放入,鸡皮朝下,以中小火,慢慢煎至出油。3~5分钟后,再将鸡腿肉反过来煎另一面至鸡腿完全熟即可上碟。
*(如果用烤炉以225度烤30分钟即可)


调味料:
小茴香粉 1大匙
黄姜粉 1大匙
辣椒粉 1大匙 (我没加)
糖 2大匙
Maggi Seasoning 2大匙


做法:
1.将所有材料(B)放入电动搅拌机搅烂,备用。


2.将已搅烂好的材料与调味料混合均匀,然后均匀的涂在鸡腿肉两面,然后存入冰箱腌制至少两个小时以上。


3.烧热平底不粘锅,将鸡腿肉放入,鸡皮朝下,以中小火,慢慢煎至出油。3~5分钟后,再将鸡腿肉反过来煎另一面至鸡腿完全熟金黄色即可上碟。
*(如果用烤炉以225度烤30分钟即可)


Lemon Grass Chicken Chop
Ingredients:
(A)4 pieces whole chicken leg, De-boned
(B)8 stalks of lemon grass,use the white portion, chopped
     12 shallots, chopped
     6 cloves, chopped
     2 stalks of coriander stem, chopped
     2 tablespoon chopped ginger

Seasoning:
1 tablespoon coriander powder
1 tablespoon turmeric powder
1 tablespoon chilli powder (optional)
2 tablespoon sugar
2 tablespoon Maggi Cukup Rasa

Method:
1.Blend the ingredients (B) well, set aside.
2.Mix it with seasoning well, rub the mixture equally on both side of the chicken. After that chill it in the refrigerator for at least 2 hours.
3.Preheat non stick pan, put the chicken on the pan which the chicken skin face down on the pan. Pan fry it with medium low heat, for 3~5 minutes. After that turn into another side to fry until golden brown color.
*(If you wish to grill the chicken, you may put in the oven and grill for about 30 minutes under 225 celsius.)


Sunday, 8 May 2016

♡椰糖龙眼冻 Gula Melaka Longan Jelly♡

简单容易的饭后甜品~
吃在嘴里甜在心的*椰糖龙眼冻*
祝天下的妈妈们~母亲节快乐!


材料:
椰糖 2片约100克
龙眼干 100克
椰子遮厘粉 半包(110克)


清水 1250毫升

做法:
1.将清水倒入锅中加入椰糖,将椰糖煮溶。
2.待煮滚后,加入龙眼干和遮厘粉搅拌均匀,然后再次让它煮滚,熄火。
3.倒入果冻模型里,待冷却凝固后存入冰箱至少两小时即可享用。


Gula Melaka Longan Jelly
Ingredients:
2 pieces (100g) Gula Melaka
100g dried Longan
1/2 packet (110g) Coconut Jelly Powder
1250ml water

Method:
1.Pour the water into a pot, add in Gula Melaka and bring it to boil.
2.After boiled, add in dried Longan and Coconut Jelly Powder, bring it to boil again, and off the heat.
3.Pour the mixture into jelly mould, bring to cool. Chill the jelly in the refrigerator for at least 2 hours.

Friday, 6 May 2016

♡脆皮烧肉 Crispy Roasted Pork♡

第二次尝试做*脆皮烧肉*, 阿妈我得佐啦!~
这次参考小蚂蚁分享的食谱, 做法与步骤简单多了,
只是在调味料方面我做了少许更改~
烤的时候,满屋飘香,吸引了两个小瓜,直盯着烤炉,迫不及待想吃呢~
烤好待凉后,切开来时,直听到咔嚓咔嚓,真的很开心~
这次皮够脆,但是我忘了彻底的把铺在皮上的粗盐刮干净,偏咸点了~
经过两次尝试,得到的经验是~要皮够脆,皮就要够干,也得刺上洞洞。


材料:
花肉(我用三层肉)2公斤
铝箔纸 2张

调味料:
盐适量 (我大概用了 1 1/2茶匙,自己自行拿捏,不同牌子的盐巴咸度不一样)
糖适量
胡椒粉 1茶匙
五香粉 1茶匙
绍兴酒 2大匙

皮面材料:
粗盐 适量
醋 少许


1.把花肉洗干净,用干净的布抹干水份,然后切成两块,在肉的部份稍微割两刀以便更容易入味。
2.把调味料均匀抹在肉的部位,然后在皮上抹上少许醋。
3.用铝箔纸做包着已涂抹好的花肉,皮的表面露出,然后存入冰箱风干2~3天(我只存一天)
4.隔天要烘烤时取出。预热烤炉,在皮面铺上粗盐,以200C烤40分钟。


5.将烧肉取出,用刀子刮掉粗盐,再用竹签在皮上刺满小洞,用厨房吸油纸洗掉多余的油份,确皮面是干爽的。


6.将铝箔纸打开,将烧肉移到另一个已铺上铝箔纸的烤盘,再次放入烤箱里面烤以200C烤至皮面爆脆约30~40分钟。
7.待烧肉凉后,再次用刀子刮掉焦黑的部份,然后斩块就可以上桌了。搭配辣椒酱味道更佳。


Ingredients:
2kg Pork belly
2 pieces aluminium foils

Seasoning:
pinch of salt (I use  1 1/2 teaspoon)
1/2 teaspoon sugar
1 teaspoon pepper
1 teaspoon five spice powder
2 tablespoon Shao Xing wine

For the skin surface:
coarse salt
vinegar

1.Rinsing the pork belly with tape water. Pat dry with clean kitchen towel. Slightly cuts on the meat portion.
2.Throughly rub the seasoning mixture into the meat as well. Brush the vinegar on top of the pork skin.
3.Place a piece of aluminium foil on the baking tray, fold it up the sides around the pork belly so that it is become a rectangle box and the pork skin is remain expose.Chill in the refrigerator for 2~3 days. (I am just chilled it for a day)
4.In the next day take out the pork belly from the fridge. Preheat the oven, covered the pork skin with coarse salt and place it in the oven and roast for 40 minutes with 200 celsius.
5.Take out the pork from the oven, remove the coarse salt from the pork belly, scrape the skin by using a knife, poke the holes by using bamboo sticks, wipe out the oil on the skin. Make sure the pork skin is dry.
6.Unfold the foil, transfer the pork on another baking tray with a piece of aluminium foil on it. Place the pork into the oven again and roast it for another 30~40 minutes with 230 celsius.
7.Bring it to cool, scrape out the scorch part with knife, cut the roasted pork into pieces, and it is ready for served.